Hello
I'm looking for a trick to quickly insert the screws from our library, in my assemblies. (I don't own the toolbox  ).
).
Thank you.
Cdt
Fred
Hello
If you insert your 1st screw and then you copy it with the constraints, it doesn't work?
Hello
It can work, but I have several dimensions of screws in my assembly.
Hello, you can use constraint references.
With this your bolts will be placed with constraints on their own.
Here's the help:
https://help.solidworks.com/2019/French/SolidWorks/sldworks/c_Mate_References_Overview_SWassy.htm
And it is indeed very practical.
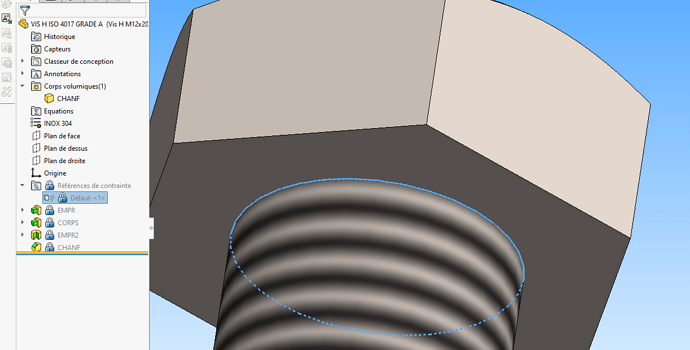
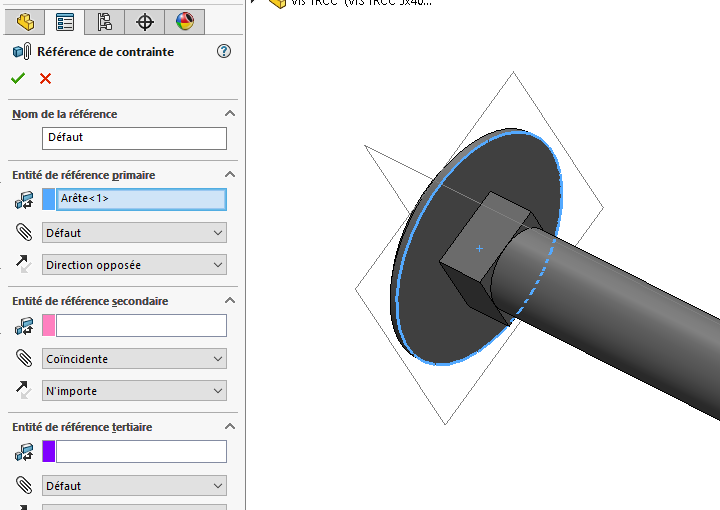
For the screws, a constraint ref on this edge for example:
And the screw automatically hooks to all holes.
It is also possible that the constraint is reversed, you just have to click on reverse constraint.
Also a box that allows you to freeze the rotation if you like totally constrained assemblies.
In my case I only have the concentric that activates but not the head tackle on the surface.
For the different screws, the best is to create your own library instead of downloading, and to make a family of parts behind it, like its in the assembly you just have to choose the right ref.
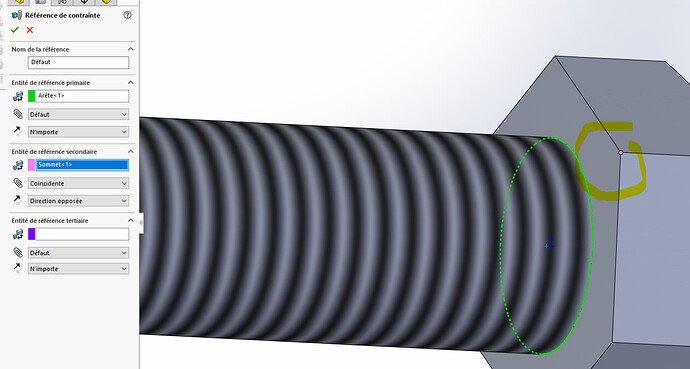
For the screw to snap to both the circle + surface, @FUZ3D , just select (in constraint ref) only stop it as on my screenshot above and the 2 constraints are added automatically then I block the rotation (right click on the circular constraint and lock the rotation.
The proof here:

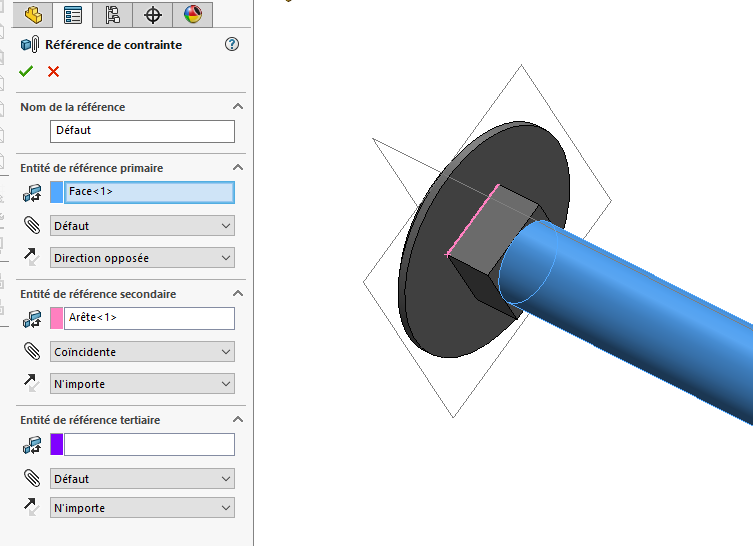
@sbadenis , yes it works for a normal screw but not in my case I have a square footprint, I always have the possibility to remove it from the 3d model, but that's not what I'm looking for.
I have only the concentric that is taken care of, then flatten the head manually.
Hello.
+1 ![]() for constraint references...
for constraint references...
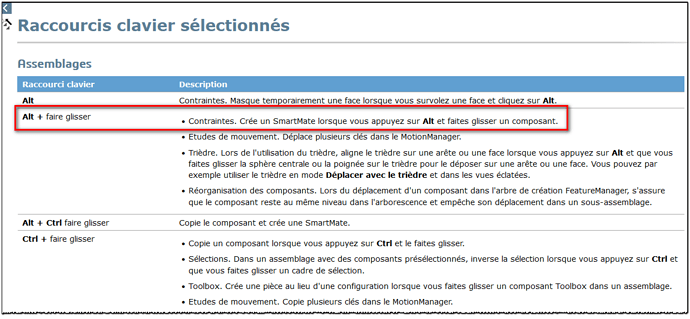
otherwise you can press ALT and bring the screw close to its drilling, possibly associated with the " TAB " key to reverse the stress...
…
List of keyboard shortcuts:
Solidworks Keyboard Scrap 2022
…
Note: what is the " Paw " button??? ![]()
Kind regards.
Hi @FUZ3D
I didn't understand everything about your post.
You can set several constraints that are added at the same time.
In the example below you have the concentricity of the edge in primary but also the point on a surface in secondary.
In the end your screw is completely blocked at insertion (except the rotation in my case)
thank you I'll try this tomorrow, not thought to use only a point or stop.
Hello
Thank you all for your different answers, on the other hand I don't know to whom to attribute the best answer between @sbadenis and @Domino_Day you have completed each other in the answer!
I'm very annoyed!
@froussel sorry but it doesn't work with my screws, only the concentric constraint applies.
I tried with edge, vertex or surface, it's the same thing.
EDIT:
Finally I succeeded by selecting the circle of the head. ![]()
But he no longer proposes "blocking rotation"
It's normal either he looks for constraint refs in the 2 rooms and he hangs the name of the identical constraint ref or he takes the 1st constraint ref and not the following ones.
Possible to cheat on the other hand by modifying your square collar screw @FUZ3D .
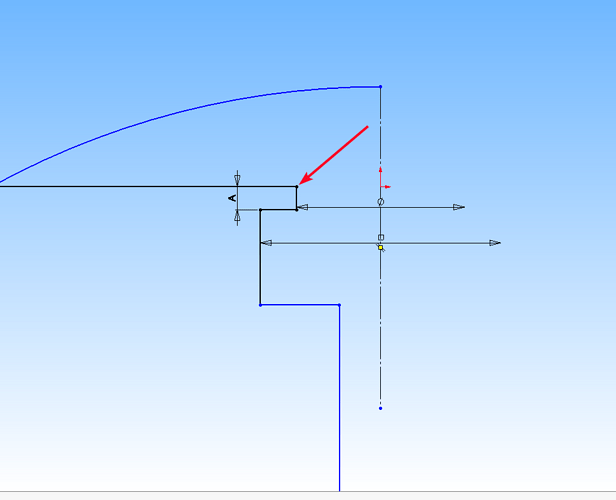
Ideally between the square and the head of the bolt I will do a small removal of circular material height 0.01mm for example to be able to select the circular edge.
Example:
A=0.01 and selection of the edge with red arrow.
It's still a hack but invisible in the screw and quick hanging in the 3D.
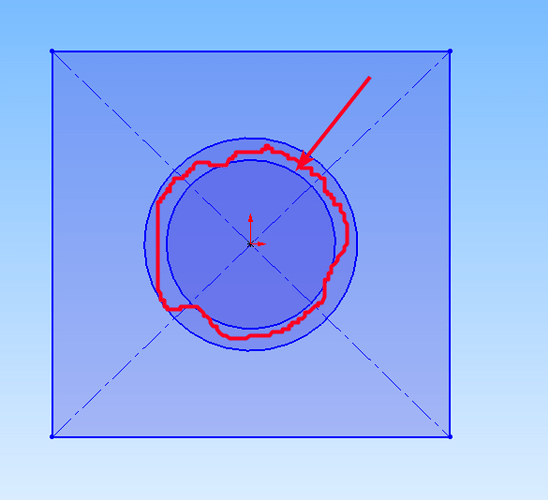
Edit:
Or even very minimal material removal also between the square and the round (red line, then selection of the edge in contact with the surface of the screw head:
