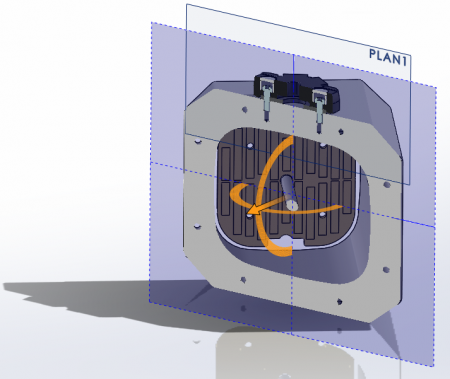
To make a check I would like to pass the cross-sectional plan through the Z axis which passes through a hole in a part of my assembly
Kind regards
plan_en_coupe.jpg
c6_t94_ppn.step
To make a check I would like to pass the cross-sectional plan through the Z axis which passes through a hole in a part of my assembly
Kind regards
You have to use the gizmo (the yellow stuff) by clicking on it. The advantage of this feature (very handy for doing a check on the fly when parts are hidden and nested with others) is that you can do whatever you want, any position and from any angle, combined or not (without using a plane or material removal). Which means according to all the DDLs.
You have three possibilities
You click and hold, tap on one of the three gestures, you can then place the center of the gizmo wherever you want.
Kind regards
PS: there is a similar function which are "interactive cutting planes" but only work for an individual part
EDIT: spelling
Hello @daniel.bourlier,
If the section is for the 3D model of the assembly: Create a reference plane containing the axis of the hole, with the desired orientation, and then select this plane before starting the section view function.
If the section is for a drawing:
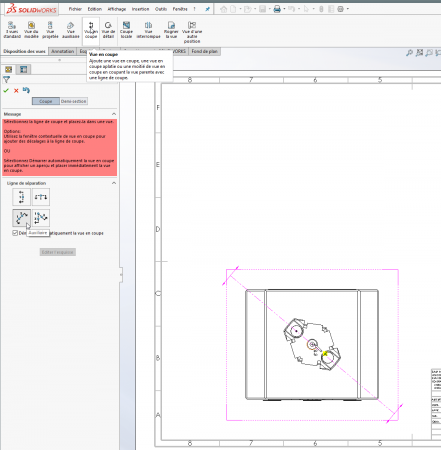
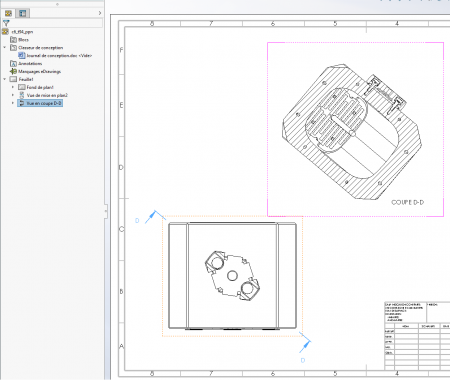
After selecting the top view of the assembly, validate Section View on the View Layout page of the command manager (or Insert menu > Drawing View> Section), then choose the "Auxiliary View" option for an oblique section.
You then need to define the cut plane trace in the top view by entering two points.
At this point, it is possible to exploit the sketch constraints to force the line through the center of the center hole (Z-axis?). Here the coincidence with the center of the circle... A second point will give the orientation of the plan.

Kind regards.