Thank you for your help @sbadenis. I think that any value in place of my 10 will not allow what you say. I'm talking about the ripple the other way around.
On the other hand, I just tried your method on another set that I have to make and it's great.
yes, sorry, it seemed like a good idea to me... I tried with a repetition based on a Helix/spiral type sketch... but no way to make the removal of material tangent to the cylinder...
I'll give more details later if needed, but basically almost the same method as @sbadenis but repeating the minimum variation to fall back on the initial shift, then repeating the geometry of the 1st repetition. The reconstruction is rather fast with this method.
@Sylk Thank you for your help but your circular repetition with increment only goes in 1 direction, I need like a ripple in 2 directions.
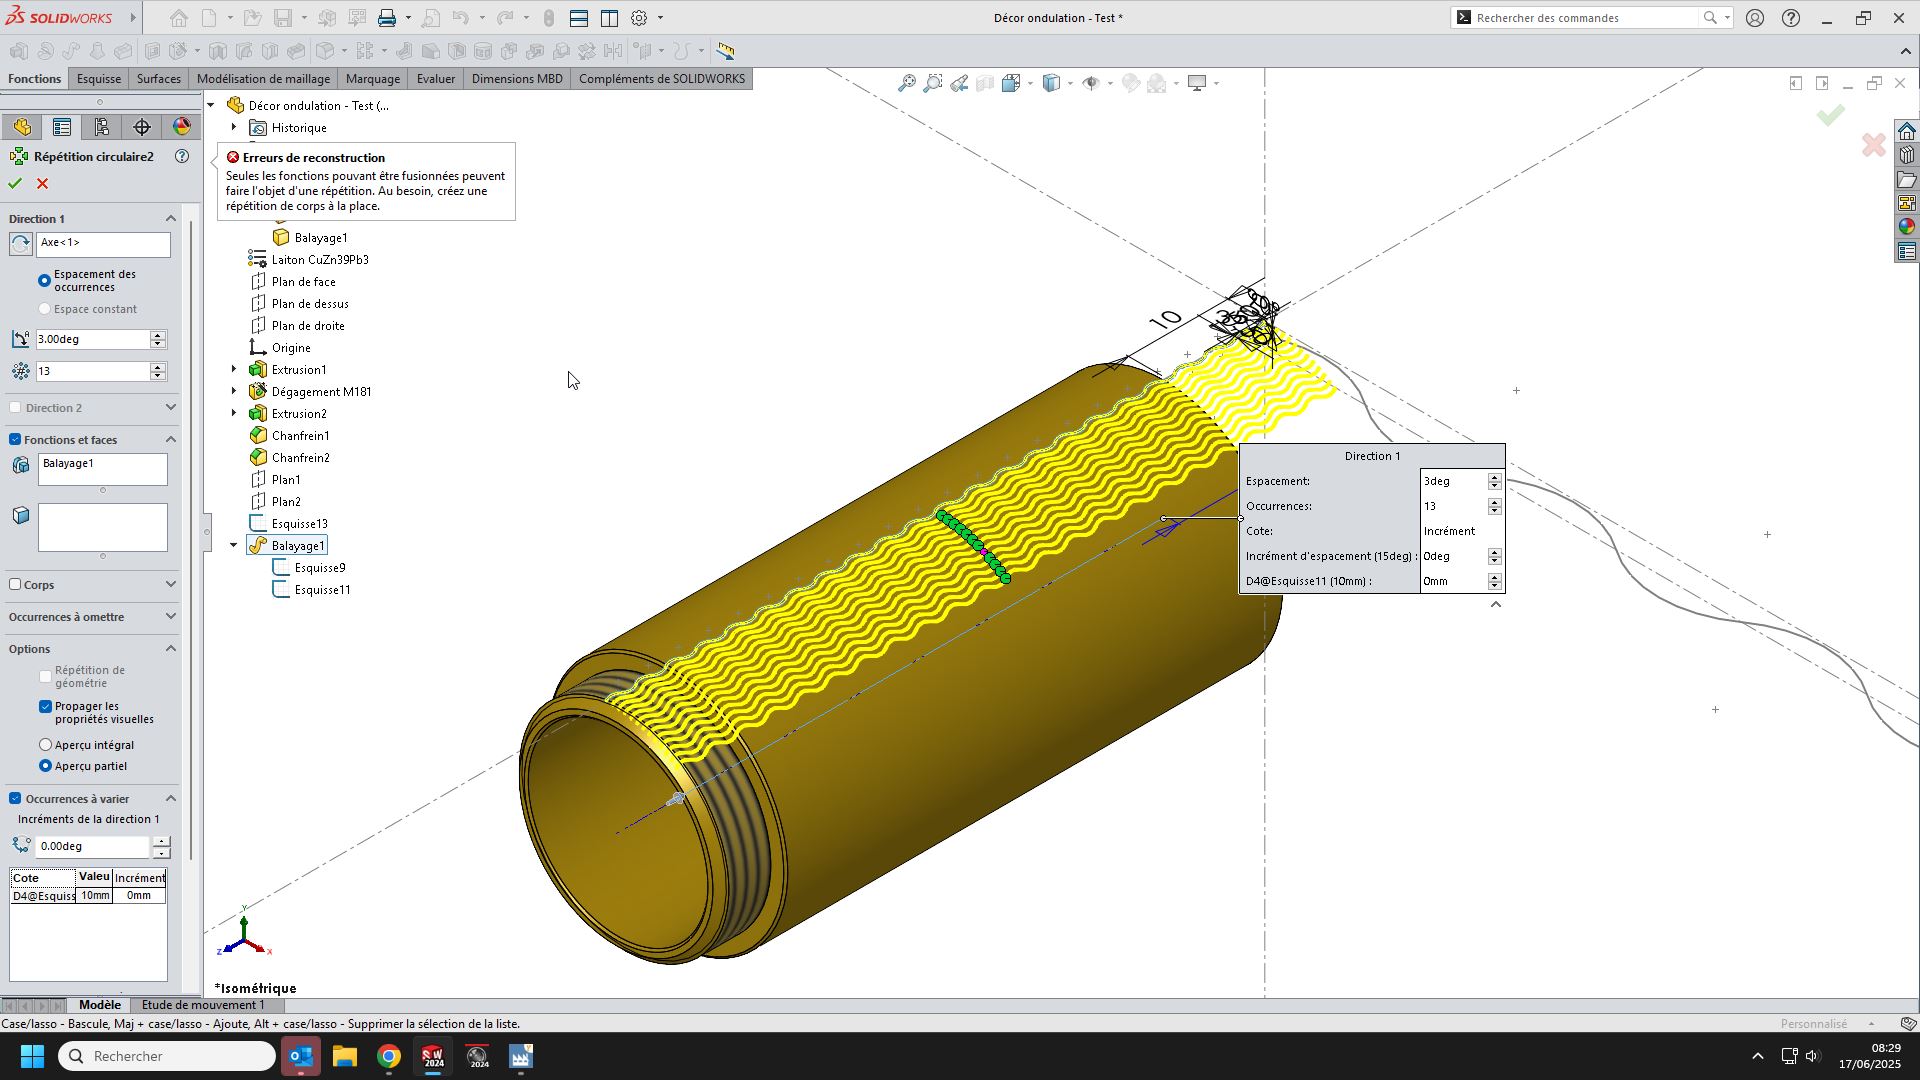
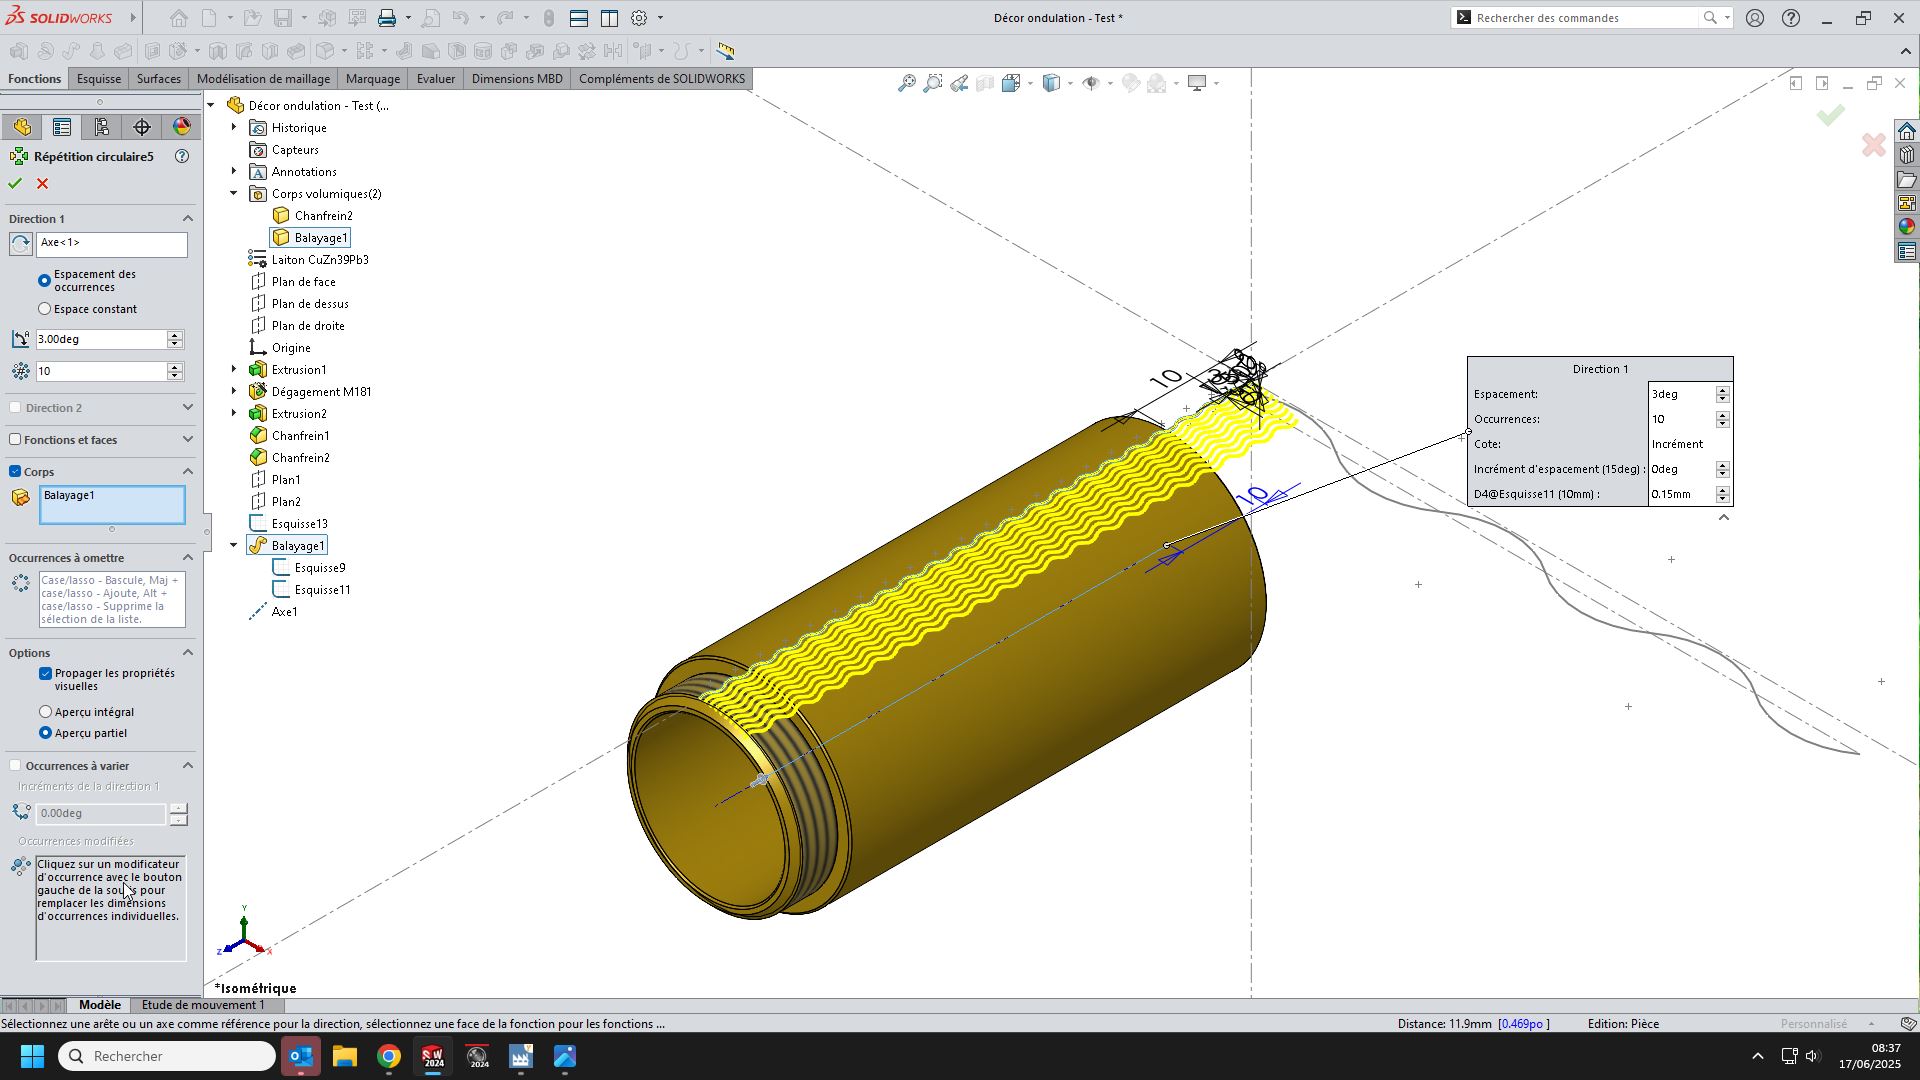
@sbadenis I've tried a lot of things but SW drives me crazy. Repeating a sweep, he refuses. If I do by selecting body, I can't increment anymore. If I do from a removal of material and I do a repetition with increments, it distorts my undulations My method, despite its complexity and the number of steps to obtain the desired result, is for the moment the only solution that suits me. Sorry friends
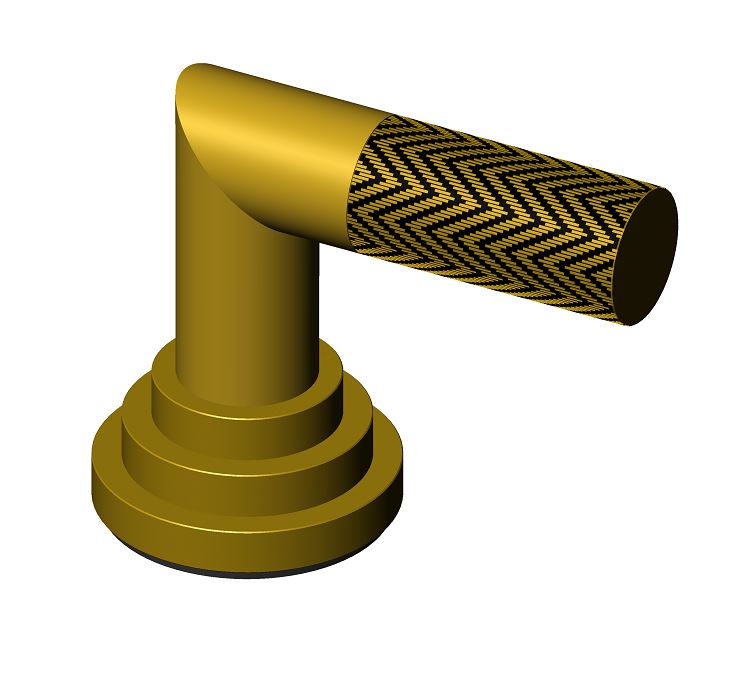
And yes, sometimes it's better to be patient during a looooong reconstruction (Solidworks is a master form in this field), rather than trying to find another solution if the first one works. That said, the challenge is interesting and it is not excluded that I will spend some more time there. And then the final rendering is still Nice.
Yes, assigning the " best answer " closes the topic. However, this attribution can be modified if ever (why not) an even better answer is proposed later.
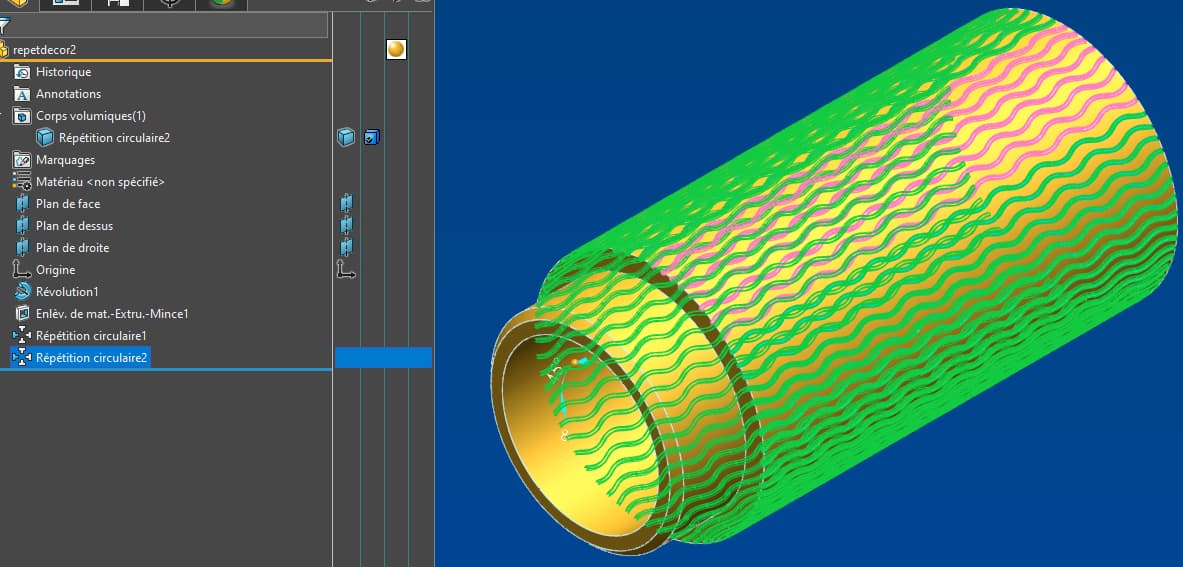
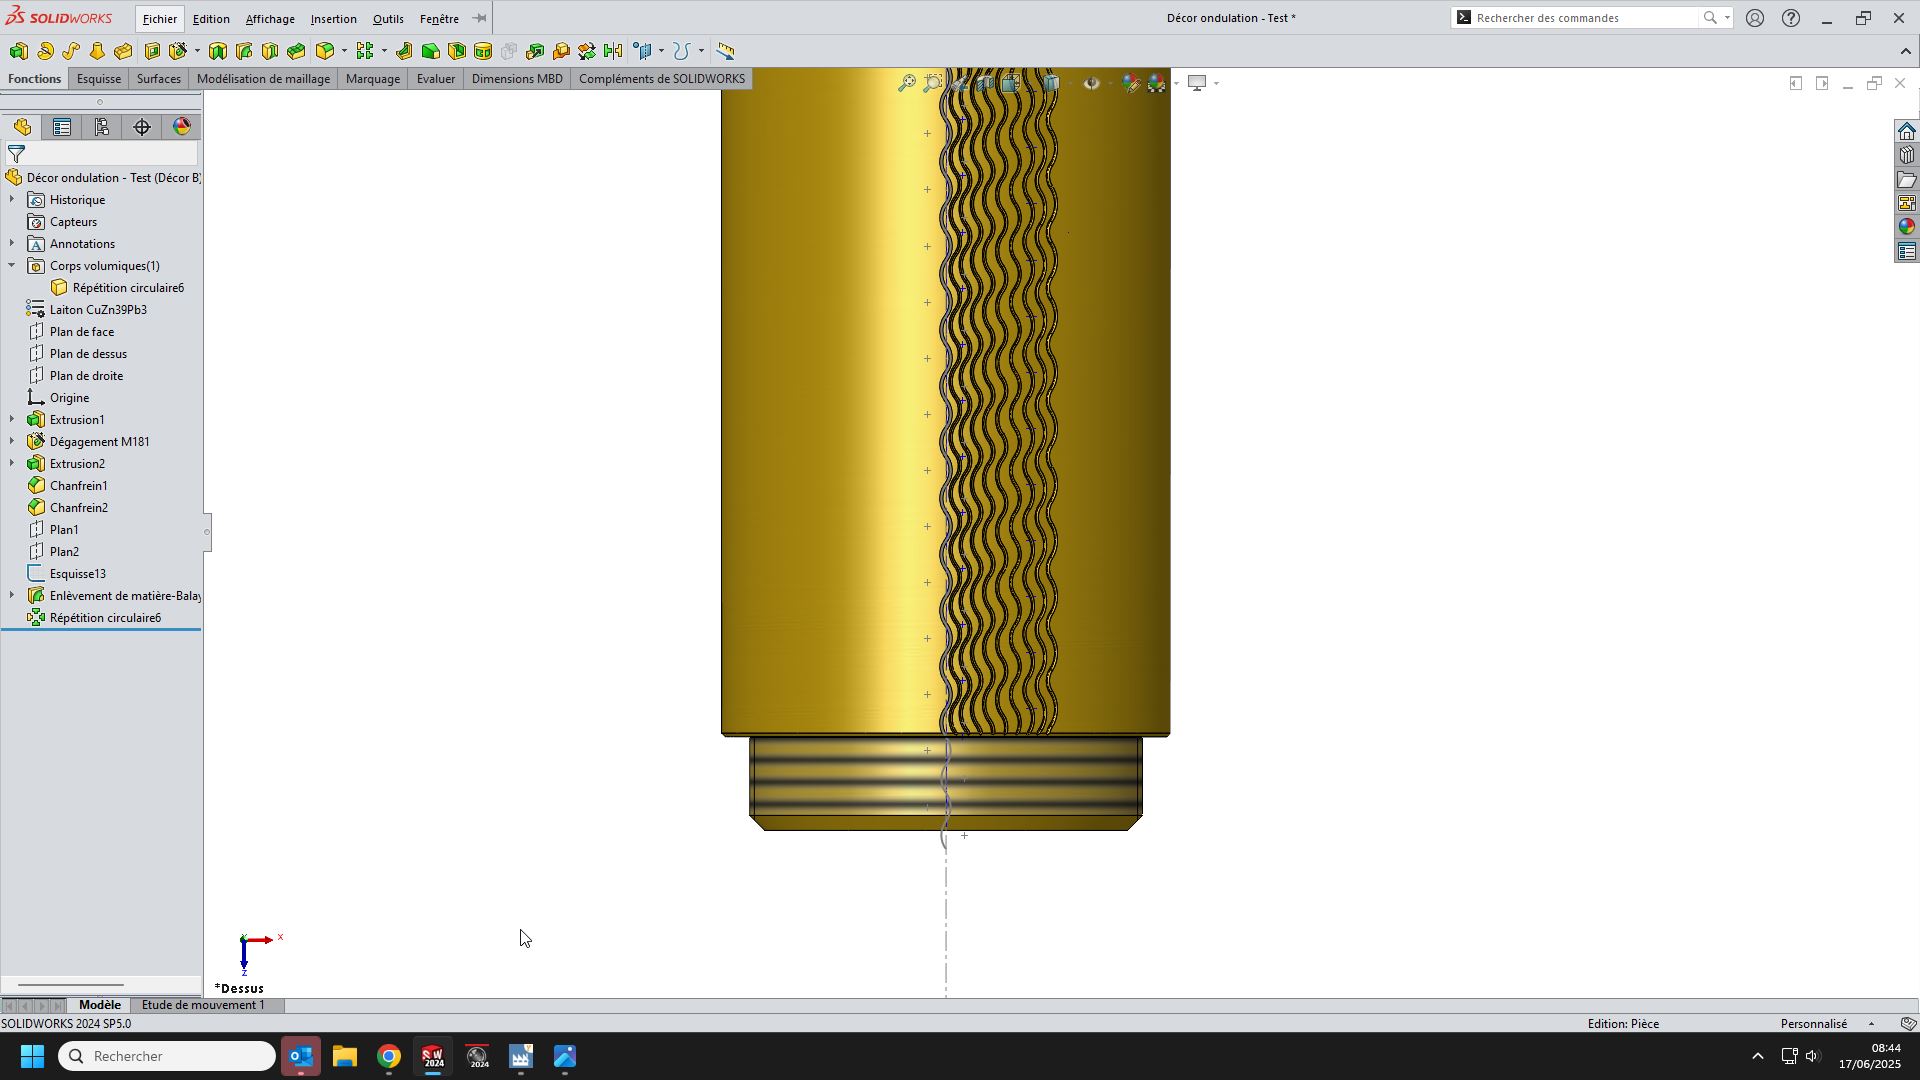
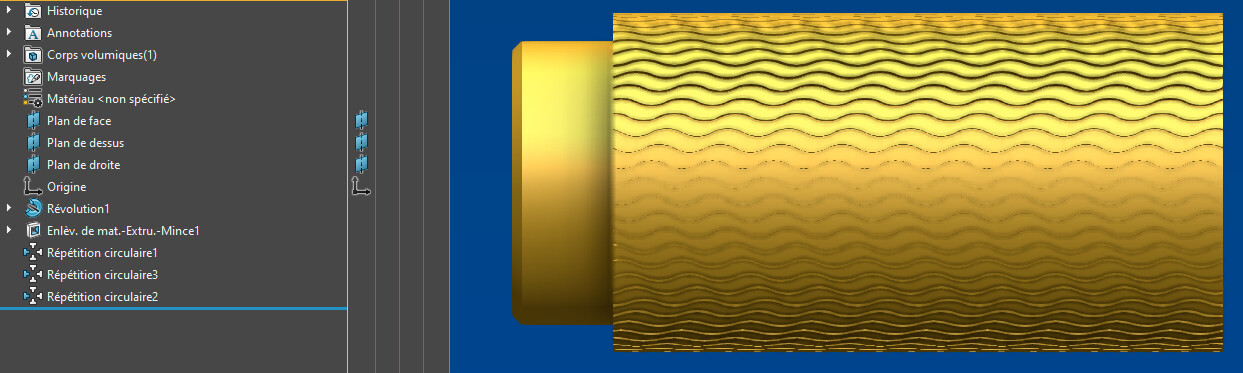
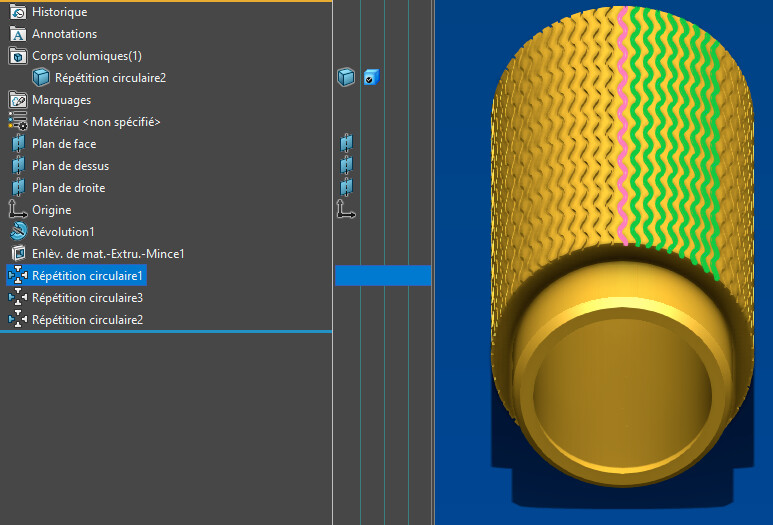
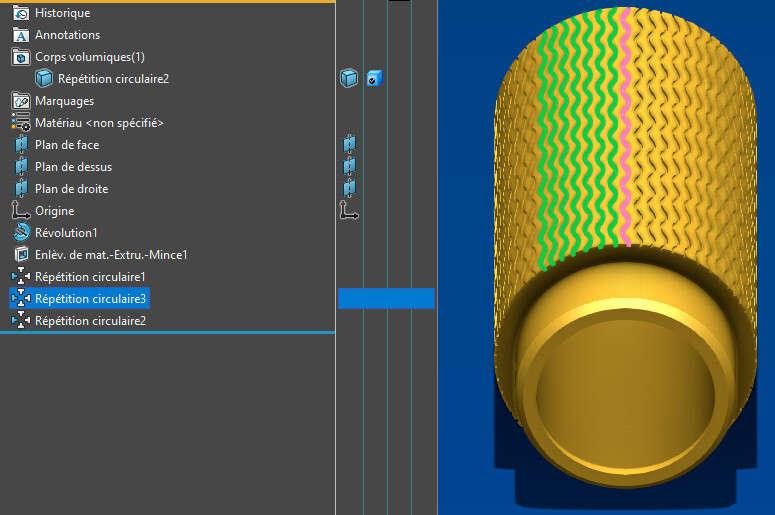
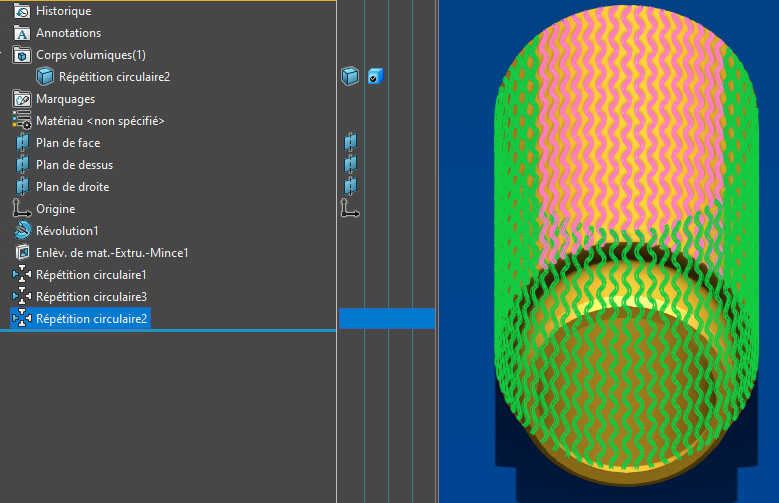
Repeat of 9 incremented occurrences, in one direction (clockwise), repetition of 8 incremented occurrences, in the other direction (counterclockwise), then repetition of the geometry of the 2 repetitions.
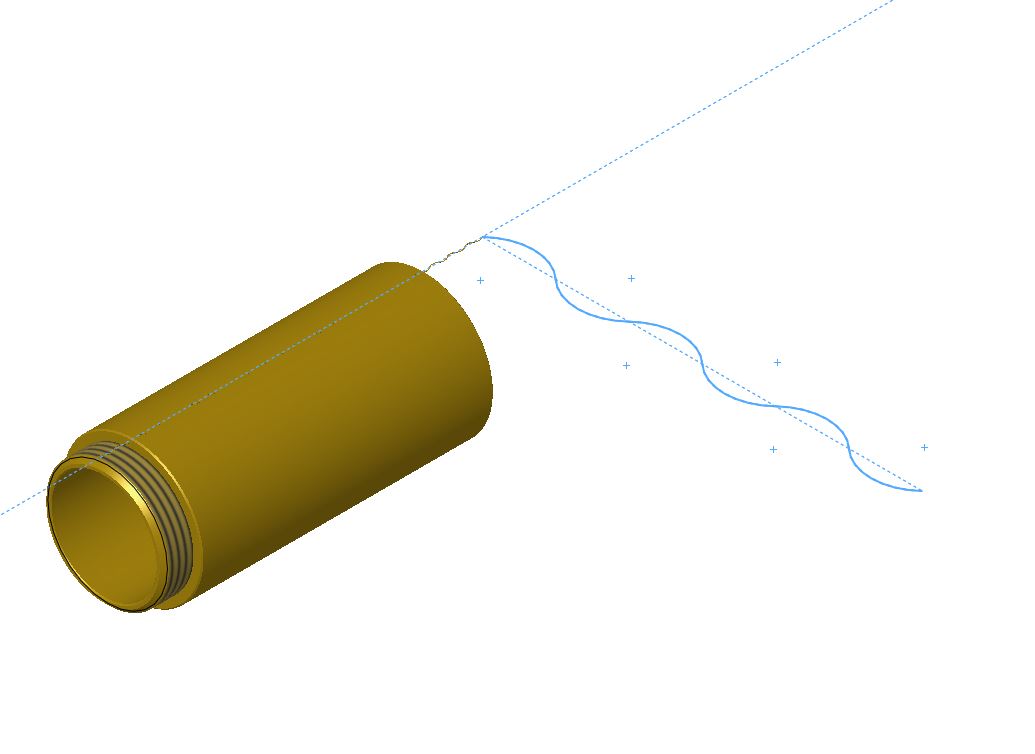
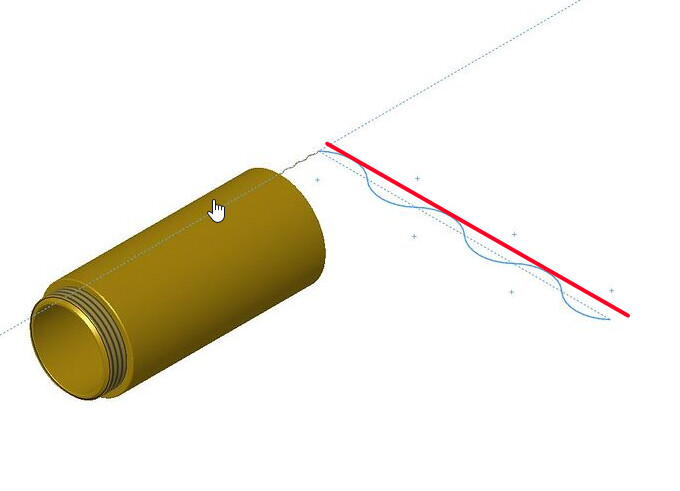
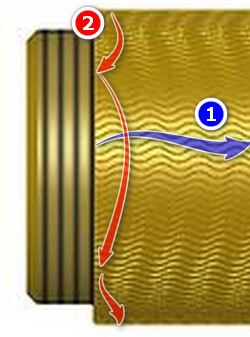
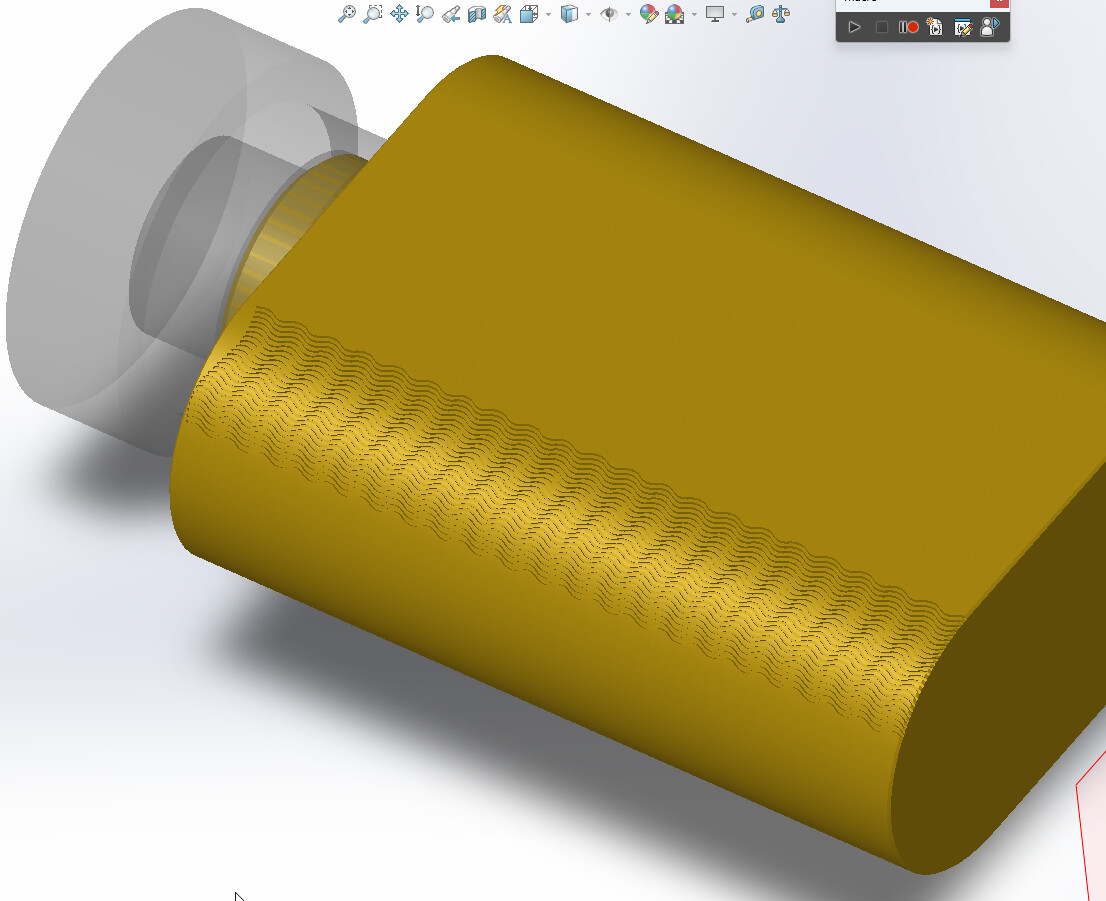
@FRED78 it is tempted; But the shift in sketches associated with the angular/linear conversion necessary for a " wave " of uncontrollable material removal seems to me, how to put it... complex.
Yes for a " Wave " (Deviation 1) no problem, now try to vary this sketch on the " X " axis to create a second "Deviation" (Deviation 2) (along the axis of the cylinder) and you will see that it is not so easy to go around the cylinder cleanly with this method... … But it's possible that I missed something...
I imagine that this is related to the fact that the pattern shift in the repetition is variable and not in constant increments. Sinusoidal appearance function in the illustration of one of the first messages of @cchandelier . It would be necessary to be able to define this shift by a formula or a curve, which SW does not propose. A macro could compensate for this lack of SW, but it's not easy...
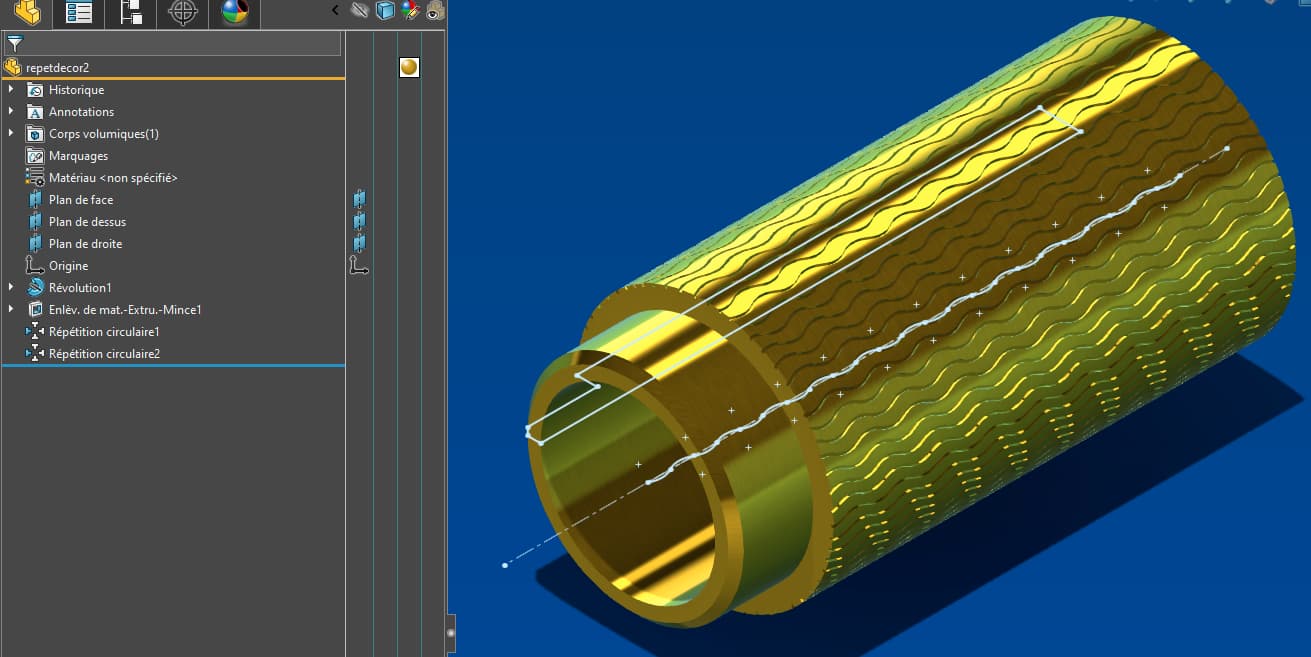
A possible variant is the use of the embossing function (which wraps a sketch around the cylinder). With this it should be possible to put all the removals in the same sketch by making variations on the repetition of the first wavy line (to have the offset along the axis of the part). Or even by using a guide curve sinusoid to do the repetitions.
In the end, the solution may be here... But to be effective, it involves a number of constraints:
Use a sketch block to define the pattern of the scenery. Interest: (relative) ease of implementation of several consecutive motifs;
Use a parametric curve in a sketch as a " guide curve" to define the offset, following a precise law. Sinusoidal in the example below;
As SW does not propose the repetition of sketch entities driven by a curve, it is necessary to set up the " scenery " blocks one by one (24) by putting for each constraint orientation (vertical), spacing (constant), position (coincidence with the guide curve). In total, 72 sketching constraints...
Wind the sketch using the embossing function, which only works if the sketch is completely inside the destination cylindrical surface. It is therefore necessary to design a body longer than necessary, and then shorten it.
And finally, the chamfers must be made after embossing. Since the edges of the body are interrupted by the scenery, the " SW Chamfer " function is unusable. Solution: material removal by smoothing.
Whew! At the end of this obstacle course, the pattern is correct and easily modifiable (it remains to be checked...) at the level of the guide curve. And there is only one sketch to manage, that of embossing, for possible adaptations.
The same principle of guide curve can be applied to a decoration on a flat face.